CopilotKit: Building an AI-Powered To-Do App with Next.js

Welcome to this hands-on tutorial where you'll learn how to build a smart to-do list application. We'll be using CopilotKit, a powerful open-source framework for building in-app AI copilots, and Next.js for our frontend. By the end of this tutorial, you'll have a to-do app that can understand natural language commands to manage your tasks.
What is CopilotKit?
CopilotKit is a full-stack framework that lets you easily build, deploy, and monitor AI-assisted features in your applications. It provides a set of tools and components to connect your app's logic and state to AI agents, creating a seamless and intuitive user experience.
Prerequisites
Before we start, make sure you have the following:
- Node.js (v18 or later) installed on your machine.
- Basic knowledge of React and Next.js.
- A Copilot Cloud public API key from the Copilot Cloud dashboard.
Step 1: Setting Up Your Next.js Project
First, let's create a new Next.js application. Open your terminal and run the following command:
npx create-next-app@latest my-todo-app --typescript --tailwind --eslint
cd my-todo-app
This will create a new Next.js project with TypeScript, Tailwind CSS, and ESLint.
Step 2: Initialize CopilotKit
Start with a single command:
npx copilotkit@latest init
Step 3: Configuring Environment Variables
Add your environment variables to .env.local.
NEXT_PUBLIC_COPILOT_API_KEY="your-copilot-cloud-public-key"- Leave
NEXT_PUBLIC_COPILOTKIT_RUNTIME_URLundefined/empty (the Cloud SDK handles routing)
Remember to replace the placeholder with your actual key. .env.local is gitignored by default.
Your Copilot provider is defined in src/app/copilotkit/layout.tsx and reads NEXT_PUBLIC_COPILOT_API_KEY from env. With Copilot Cloud, you do not need to run your own API route.
Step 4: Building the To-Do App UI
Create the user interface
Let's create the user interface for our to-do list. Replace the code at src/app/copilotkit/page.tsx with the following code.
// src/app/copilotkit/page.tsx
"use client";

import { useState } from "react";
import { useCopilotAction, useCopilotReadable } from "@copilotkit/react-core";
import { CopilotSidebar } from "@copilotkit/react-ui";

interface Todo {
  id: number;
  text: string;
  completed: boolean;
}

export default function Home() {
  const [todos, setTodos] = useState<Todo[]>([]);
  const [newTodo, setNewTodo] = useState("");

  // Expose current todos so Copilot can read them
  useCopilotReadable({
    description: "The user's current to-do items with their completion status.",
    value: todos,
  });

  useCopilotAction({
    name: "manage_todos",
    description: "Manage the to-do list.",
    parameters: [
      {
        name: "action",
        type: "string",
        description: "The action to perform: 'add', 'remove', or 'toggle'.",
        enum: ["add", "remove", "toggle"],
      },
      {
        name: "todo",
        type: "string",
        description: "The to-do item to manage.",
      },
    ],
    handler: ({ action, todo }) => {
      if (action === "add") {
        setTodos((prev) => [
          ...prev,
          { id: Date.now(), text: todo, completed: false },
        ]);
      } else if (action === "remove") {
        setTodos((prev) => prev.filter((t) => t.text !== todo));
      } else if (action === "toggle") {
        setTodos((prev) =>
          prev.map((t) =>
            t.text === todo ? { ...t, completed: !t.completed } : t
          )
        );
      }
    },
  });

  const handleAddTodo = () => {
    if (newTodo.trim() !== "") {
      setTodos([...todos, { id: Date.now(), text: newTodo, completed: false }]);
      setNewTodo("");
    }
  };

  return (
    <CopilotSidebar>
      <div className="flex flex-col items-center justify-center min-h-screen bg-gray-100 p-4">
        <div className="w-full max-w-md p-6 bg-white rounded-lg shadow-md">
          <h1 className="text-2xl font-bold mb-4">My To-Do List</h1>
          <div className="flex mb-4">
            <input
              type="text"
              value={newTodo}
              onChange={(e) => setNewTodo(e.target.value)}
              className="flex-grow p-2 border rounded-l-md"
              placeholder="Add a new to-do"
            />
            <button onClick={handleAddTodo} className="p-2 bg-blue-500 text-white rounded-r-md">
              Add
            </button>
          </div>
          <ul>
            {todos.map((todo) => (
              <li
                key={todo.id}
                className={`flex items-center justify-between p-2 mb-2 rounded-md ${
                  todo.completed ? "bg-green-200" : ""
                }`}
              >
                <span className={todo.completed ? "line-through" : ""}>
                  {todo.text}
                </span>
              </li>
            ))}
          </ul>
        </div>
      </div>
    </CopilotSidebar>
  );
}
Note: useCopilotReadable makes your todos visible to Copilot so it can answer questions like “what are my todos?”.
Making It Smart with useCopilotAction
The magic happens with the useCopilotAction hook. This hook allows us to define actions that our AI copilot can perform. In our case, we've created a manage_todos action that can add, remove, or toggle to-do items.
The handler function in useCopilotAction is where we define the logic for each action. When you give a command to the copilot (e.g., "add a new to-do to buy milk"), it will call this function with the appropriate parameters.
Step 5: Running Your Application
Now, let's see our AI-powered to-do app in action. Run the development server:
npm run dev
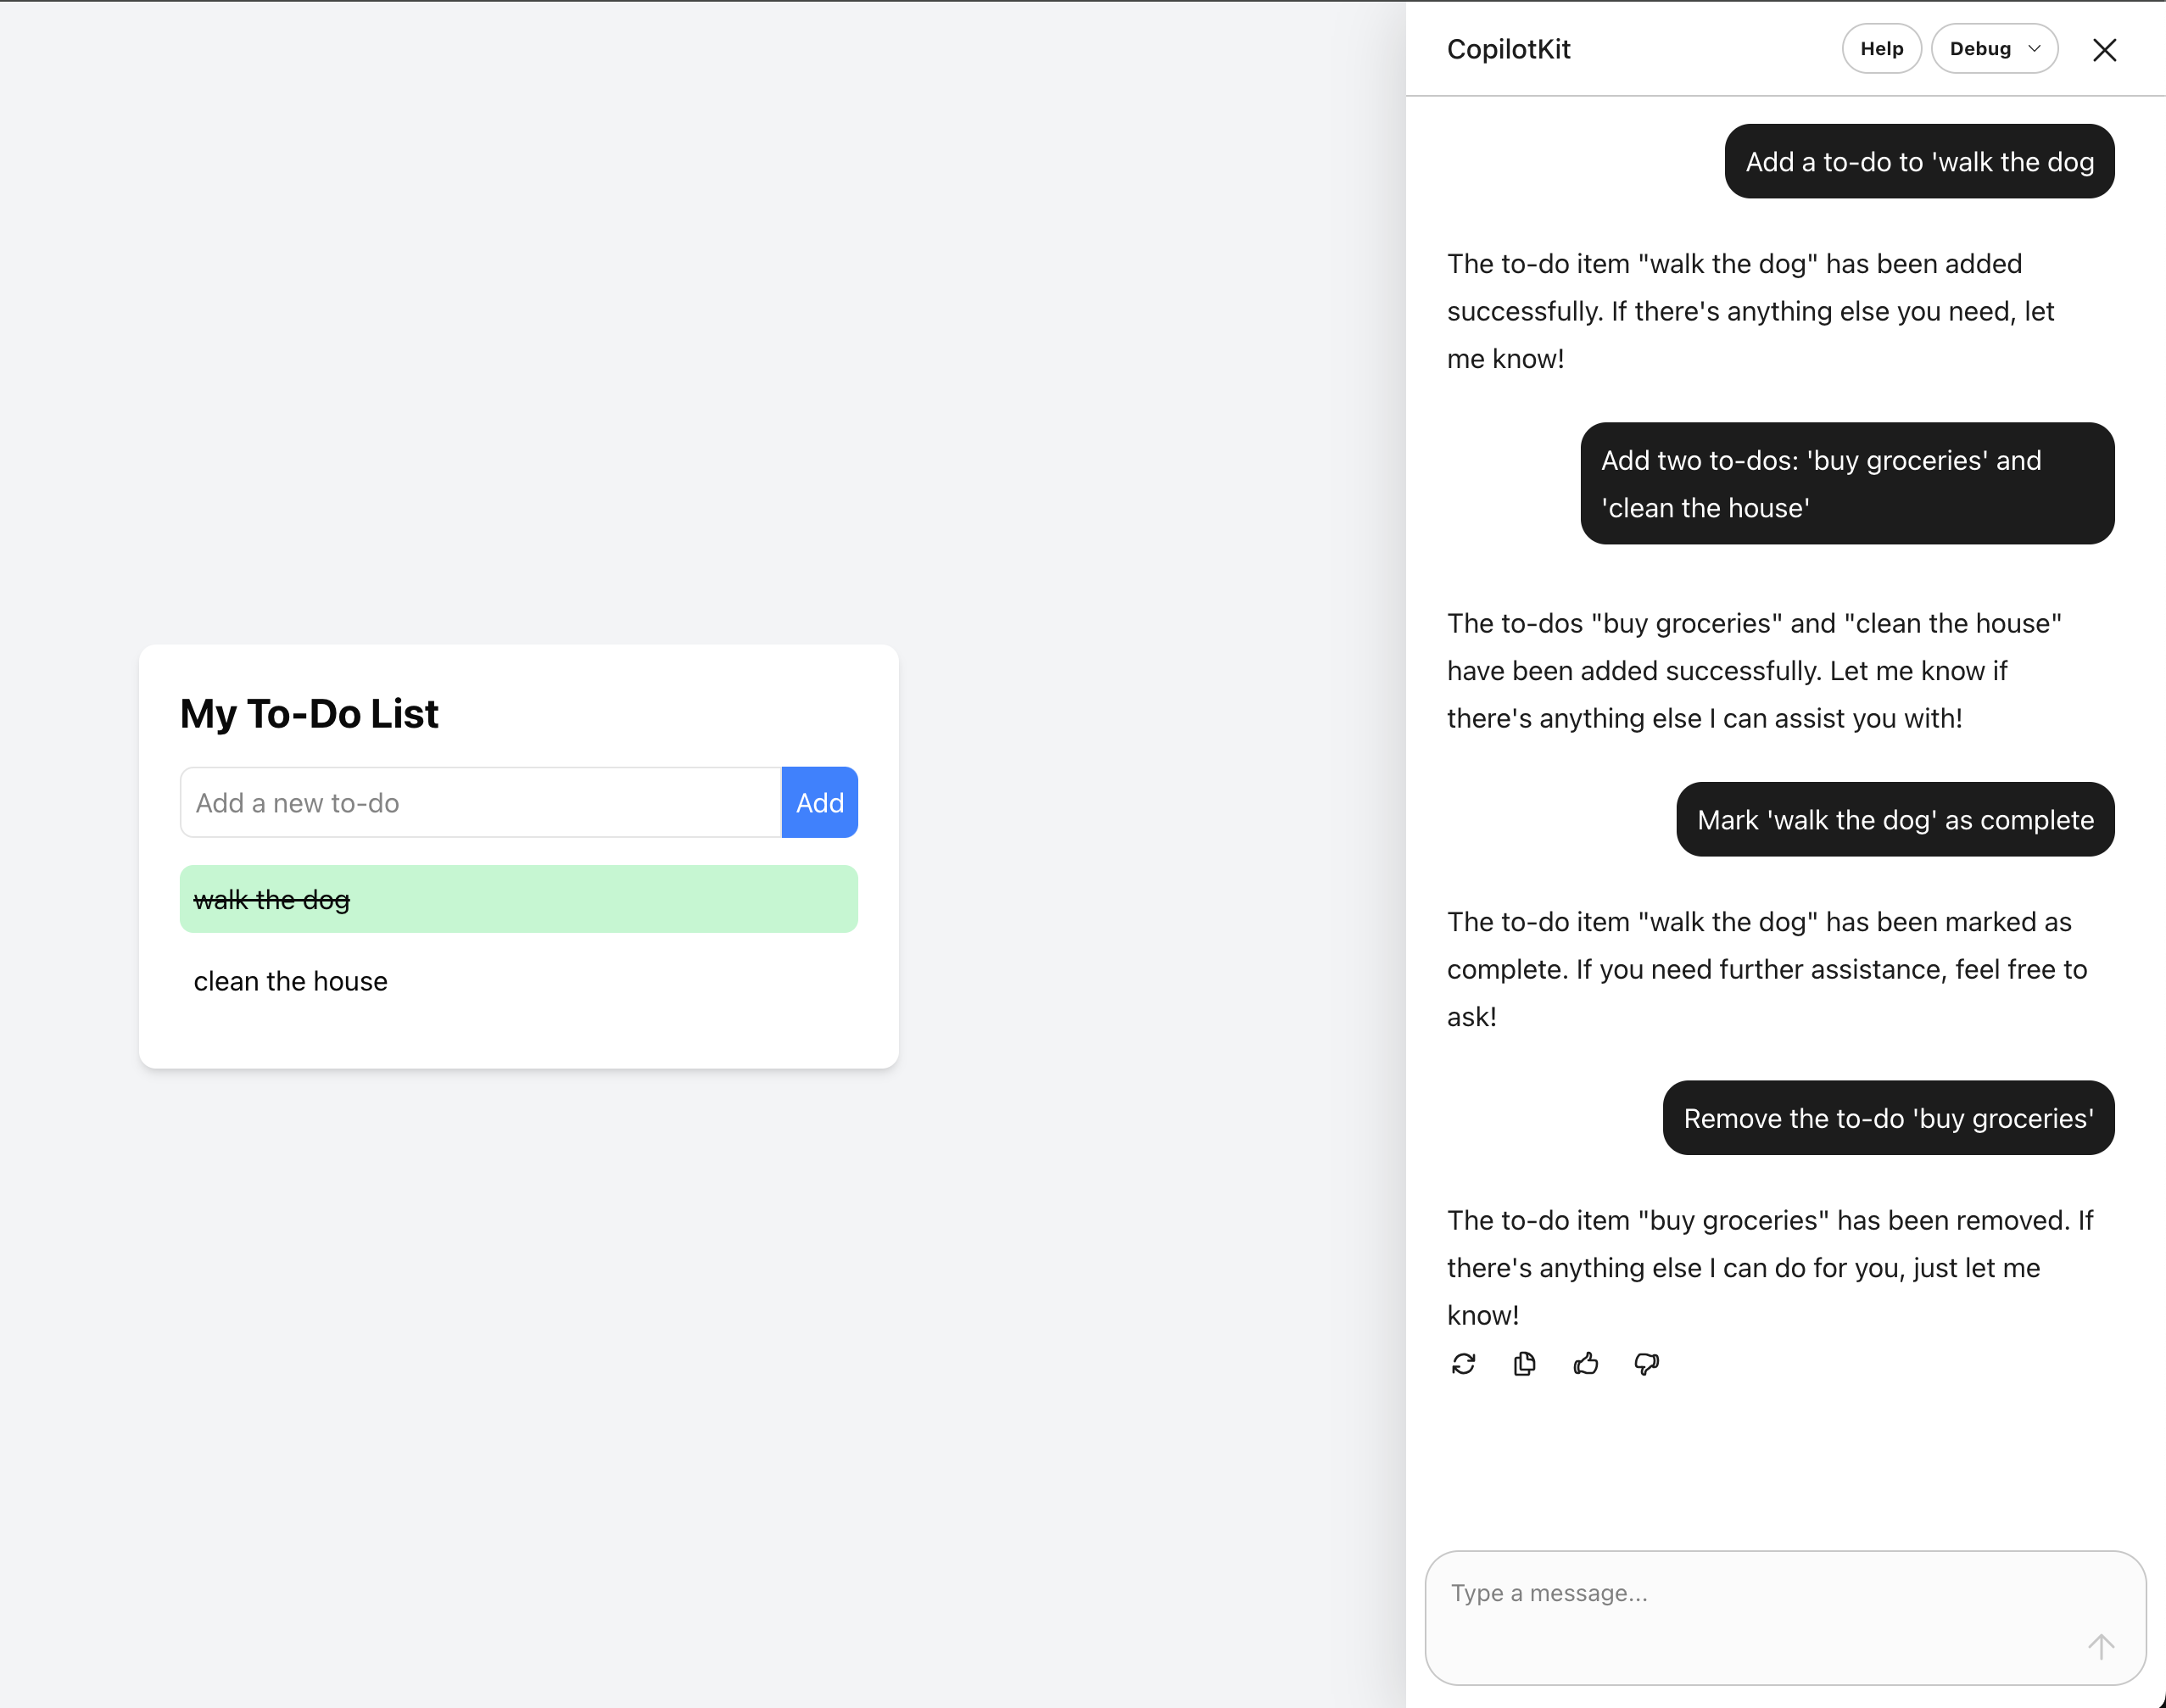
Open your browser and navigate to http://localhost:3000/copilotkit. You'll see your to-do list application with a Copilot sidebar. Try giving it some commands:
- "Add a to-do to 'walk the dog'"
- "Add two to-dos: 'buy groceries' and 'clean the house'"
- "Mark 'walk the dog' as complete"
- "Remove the to-do 'buy groceries'"
You'll see the to-do list update in real-time as the AI executes your commands.
Conclusion
Congratulations\! 🎉 You've successfully built an AI-powered to-do list application using CopilotKit. You've learned how to:
- Set up a Next.js project with CopilotKit.
- Configure API keys using a
.env.localfile. - Use the
- Define custom actions with the
useCopilotActionhook to make your application interactive.
CopilotKit offers many more features to explore, such as CopilotTask for one-off tasks and CopilotTextarea for AI-assisted writing. I encourage you to check out the official CopilotKit documentation to learn more.
Happy coding!